-
ZXP@handpic.com.cn
-
 Chinese
 Chinese
With the rapid development of the electronics industry, and the industrial manufacturing process, precision hardware accessories are the most commonly used precision components in automotive aviation communications, in order to ensure the quality of industrial products, it is necessary to measure the size of each component to ensure that the product assembly is tightly stitched. However, sometimes it is necessary to test the product profile, which can not only detect one surface on the top of the product, but also six dimensions on the side and back of the product. Traditional measuring equipment can only measure one plane at a time. If multiple product dimensions need to be tested, a separate measurement program needs to be established. The measurement process is cumbersome and inefficient. The demand for product profile size detection is also increasing. Compared with the traditional measurement methods, how to greatly improve the detection efficiency, fast and efficient completion of high-precision measurement.

Demonstration method: 1. Place the edge of the fixture with a sample workpiece and place it directly below the camera.
2, adjust the focal length, magnification and brightness required by the light source
3. Add measuring tools and set tolerances with the required testing content.
4, the use of "program teaching" direct operation detection. (The content of operation detection can be selected: modify elements, add elements, quantity failure elements, quantity exceeding tolerances)
Archiving: 1, the measurement history can be reserved to the file (parameters → system)
2, after the program teaching can open a new window to display data (parameters → teaching, weight)
Batch testing process: 1, the equipment installed fixture, fixed the material position.
2. Set the content to be detected according to the previous demonstration method. Enter the upper and lower limits of the tolerance requirements
3, click "Save new file" to save the set content, and then enter the program from "Select new file". Click "Program Instruction" to begin testing
4. When replacing other workpieces, place the workpieces in the original position where the fixture is fixed
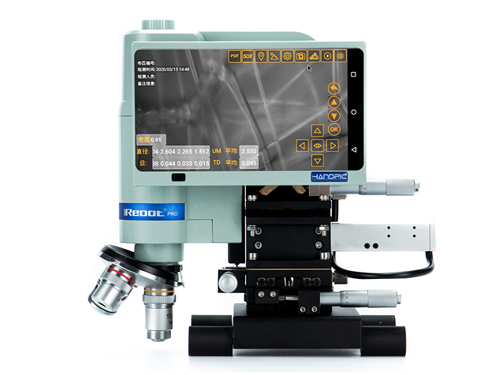
The user only needs to place the workpiece smoothly on the measuring instrument when in use, press the start key, the image is equipped with an autofocus module, automatically identify the measuring part, reduce the deformation caused by human touch, and is equipped with a double telecentric lens, high resolution, low imaging distortion, and high accuracy of measurement results. It can be measured by 360° rotation and has the function of inflection point measurement. In the past, the measurement required multiple steps, and now it can measure nearly 100 positions in 1 second, saving the detection time
Copyright © Beijing Handpic Image Equipment Co., Ltd. All Rights reserved Technical Support: 【
Record number:】
【
Back to top】
【
Record number:】
【
Back to top】